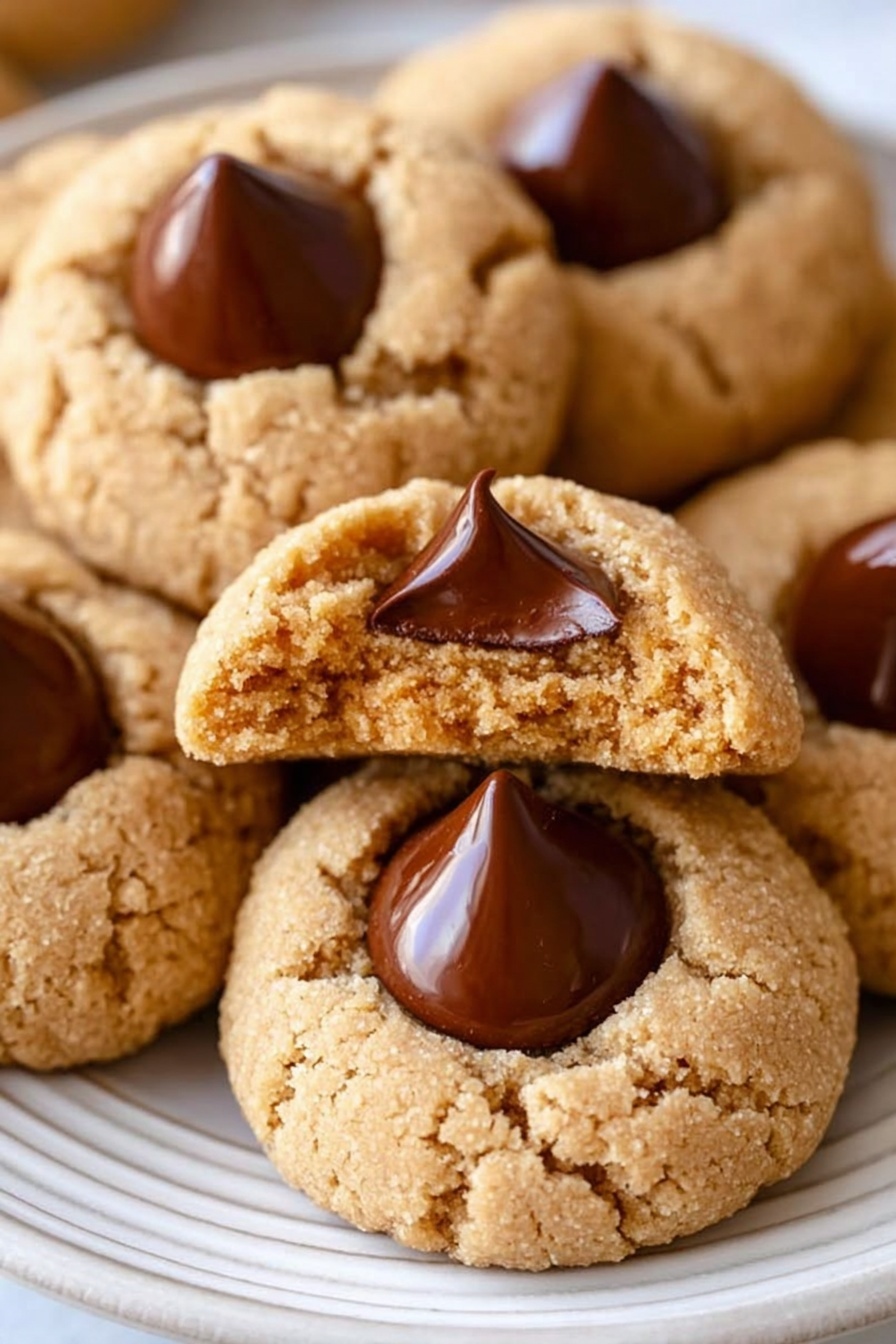
There’s nothing quite like biting into a soft, chewy cookie that marries the salty richness of peanut butter with the sweet surprise of melting chocolate. This Peanut Butter Kiss Cookies Recipe is just that—a timeless treat that’s as fun to make as it is to eat. It’s simplicity and nostalgia wrapped up in every little bite.

Jump to:
Why You'll Love This Recipe
I’ve made Peanut Butter Kiss Cookies countless times, and honestly, they always bring a smile to my face—and those I share them with. The balance between the chewy peanut butter dough and that gooey chocolate center is pure magic. They’re so easy to whip up, but the result feels like a special occasion.
- Classic Nostalgia: This recipe brings back sweet childhood memories with every bite, made easy and foolproof.
- Simple Ingredients: You likely have everything on hand—no fancy or hard-to-find items needed.
- Perfect Texture: Soft, chewy cookies paired with crisp edges and a melty chocolate kiss in the center.
- Great for Sharing: These cookies are a hit at parties, bake sales, or just for cozying up at home.
Ingredients & Why They Work
Each ingredient in this Peanut Butter Kiss Cookies Recipe plays a key role. The peanut butter and butter bring both flavor and softness, sugars give sweetness and texture, and that egg and milk balance moisture perfectly. Here’s why they work so well together and what to keep in mind when shopping.
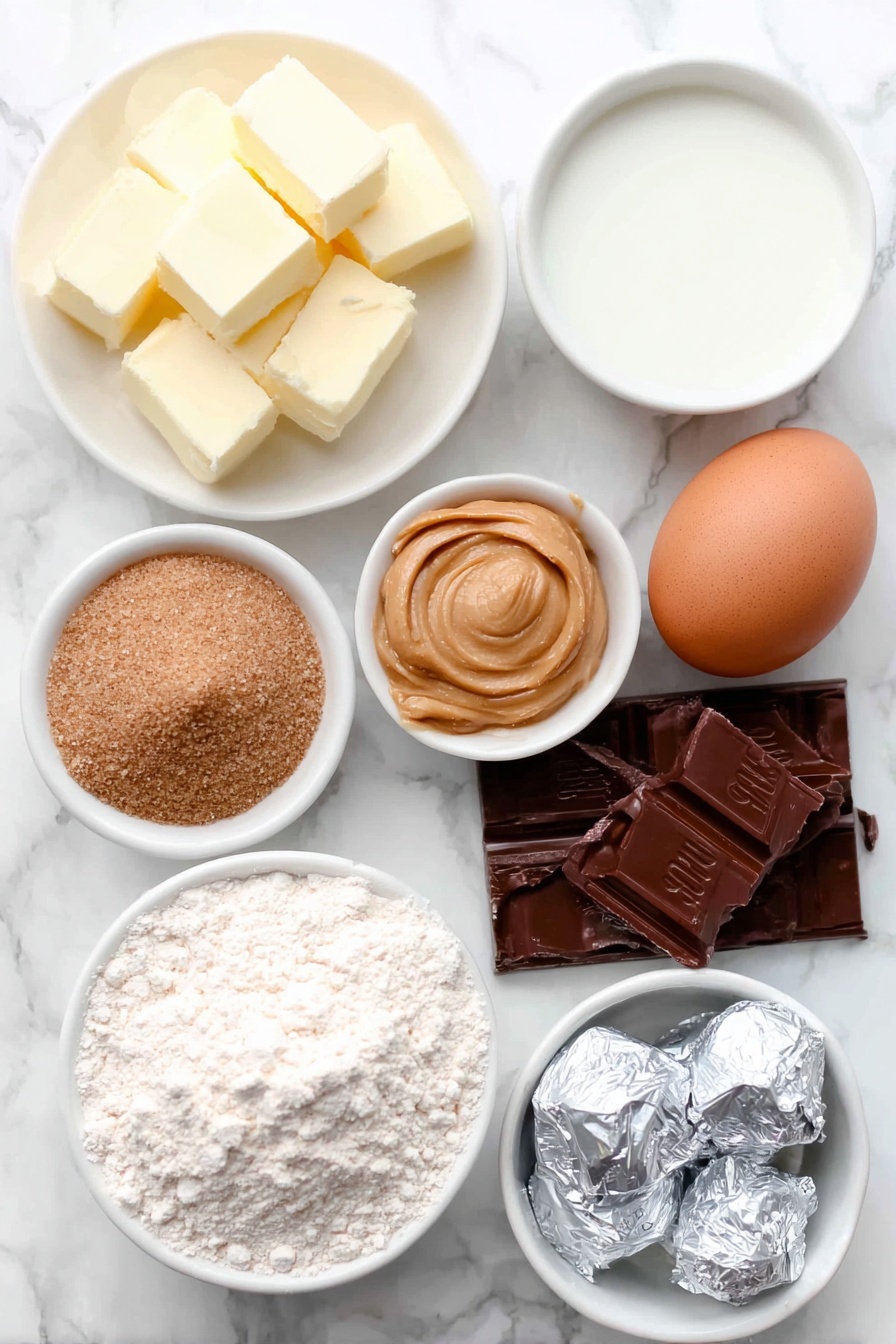
- Unsalted Butter: Softened butter adds rich creaminess and helps create that tender crumb you want in a peanut butter cookie.
- Creamy Peanut Butter: Use a classic creamy style for smooth dough and that signature peanut butter taste.
- Light Brown Sugar: Gives a subtle molasses flavor and keeps cookies moist and chewy.
- Granulated Sugar: Adds a bit of crispness and helps the cookie edges caramelize nicely, plus it’s used for rolling the dough balls.
- Vanilla Extract: Just a splash enhances all the flavors and brings warmth to the cookie.
- Large Egg: Binds the ingredients together and helps with the cookie’s soft texture.
- Milk: A tablespoon adds moisture that keeps the cookies from getting dry.
- Baking Soda: Gives a little lift and helps the cookies spread just right.
- Salt: Balances sweetness and enhances the peanut butter flavor.
- All-Purpose Flour: The base ingredient that holds everything together.
- Hershey’s Kisses: The signature chocolate topping that melts perfectly into the warm cookie—unwrap them just before baking!
Make It Your Way
I love to stick to the classic Peanut Butter Kiss Cookies Recipe, but once in a while, I like to fiddle with it a bit. Don’t be shy about making this recipe your own—it’s forgiving and flexible.
- Variation: I sometimes swap half of the creamy peanut butter for chunky peanut butter to add a bit of crunch—it’s a fun twist that still delivers that classic flavor.
- Dietary Mod: For a gluten-free version, I’ve successfully used a blend of gluten-free all-purpose flour—it changes the texture slightly but still tastes great.
- Chocolate Twist: Try using mini peanut butter cups instead of Hershey’s Kisses for an extra peanut-chocolate punch.
- Seasonal Flair: Around holidays, I like rolling the dough balls in colored sugar for a festive touch that’s always a hit with guests.
Step-by-Step: How I Make Peanut Butter Kiss Cookies Recipe
Step 1: Cream Together the Butters and Sugars
Start by mixing the softened butter and creamy peanut butter in a large bowl. Use a hand mixer or stand mixer to get them nice and smooth. The key here is really creaming them well before adding sugars—this helps your cookies be soft but not greasy. Then, add the brown sugar and granulated sugar, and mix until the whole mixture is light and fluffy. It’s a small step but sets the tone for that perfect chewy texture.
Step 2: Mix in the Wet Ingredients
Next, crack in your egg, pour the vanilla extract, and add a tablespoon of milk. Mix on medium speed until everything’s smoothly combined. You’ll notice the dough looks creamy and ready to embrace the dry ingredients—almost like cookie magic starting to happen!
Step 3: Incorporate Dry Ingredients Carefully
Sift in the baking soda and salt for even distribution, then slowly add the flour. Mix just until the dough comes together—overmixing here can make cookies tough, so I like to mix gently and scrape down the bowl sides once or twice to make sure everything is incorporated evenly.
Step 4: Roll and Sugar Coat Your Dough Balls
Fill a small bowl with granulated sugar and roll tablespoon-sized balls of dough in it before placing them on your lined cookie sheets. Spacing them about 2 inches apart helps them bake evenly without merging. Unwrapping the Hershey’s Kisses while the cookies bake is a quick way to keep the process flowing.
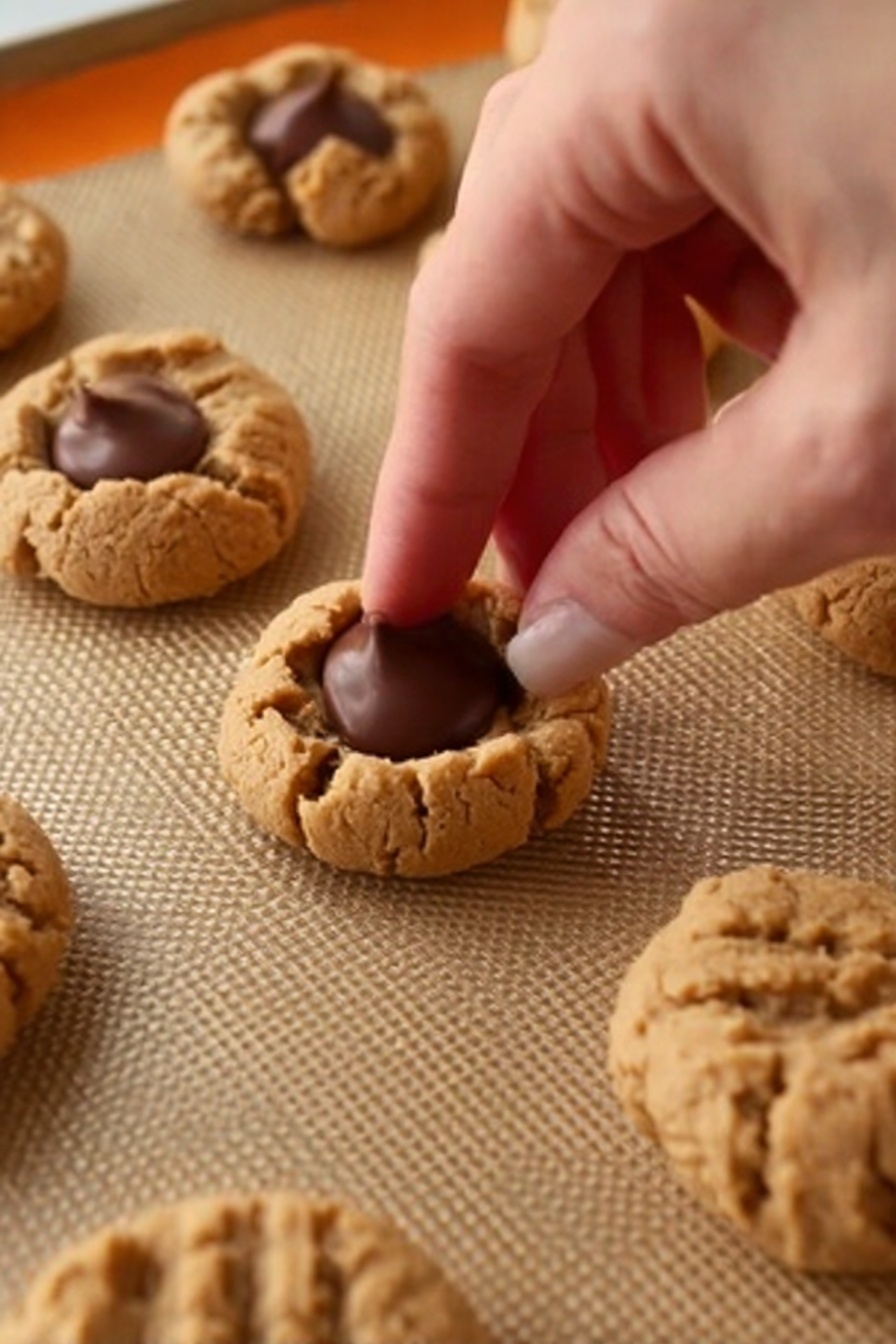
Step 5: Bake and Add Kisses
Bake the cookies at 350°F for 9 to 13 minutes—watch for edges turning golden brown and tops losing their glossy shine. This is your cue to pull them out and gently press a chocolate Kiss into the center of each cookie while they’re still warm. Let them cool before removing from the sheet to let the chocolate set perfectly.
Top Tip
After making this Peanut Butter Kiss Cookies Recipe several times, I’ve learned some little tricks that make all the difference. These tips make sure your cookies come out just right every time and help avoid common pitfalls I’ve done the hard work to figure out!
- Butter Softening: Make sure your butter is softened—but not melted—to help the dough come together smoothly without getting greasy.
- Don’t Overmix the Flour: Mixing too long after adding flour develops gluten and makes cookies tough; mix just until combined.
- Press the Kisses Gently: Don’t push the chocolate kisses too deep into cookies while hot to avoid them sinking; just a gentle press is perfect.
- Roll in Sugar Twice for Crunch: For a little extra texture, roll the dough balls twice—once before baking and once immediately after placing them on the sheet.
How to Serve Peanut Butter Kiss Cookies Recipe
Garnishes
I usually let the cookie’s natural charm shine without extra garnish, but for a festive touch, a sprinkle of flaked sea salt over the chocolate while it’s still warm creates a lovely salty-sweet contrast that’s divine. Sometimes, a light dusting of powdered sugar just before serving makes these cookies look like little winter treasures.
Side Dishes
When it comes to pairing, a cold glass of milk is my go-to—it just complements the richness like nothing else. If you want to turn it into a little dessert plate, add fresh strawberries or apple slices for a fresh contrast.
Creative Ways to Present
For birthdays or holiday parties, I’ve arranged these Peanut Butter Kiss Cookies on tiered stands with some colorful sprinkles or edible glitter on top. Gift-wrap them in cellophane bags tied with ribbons—it always scores brownie points with friends and family!
Make Ahead and Storage
Storing Leftovers
My favorite way to store these cookies is in an airtight container at room temperature for up to a week. I layer them with parchment paper to keep the kisses from sticking or melting into one another. They stay wonderfully soft and chewy—no need to hoard them!
Freezing
I’ve frozen the dough balls before baking by placing them on a tray, freezing until solid, then storing in freezer bags. When I want cookies fresh-baked, I just pop them straight in the oven from frozen, adding a minute or two to the bake time. The cookies come out almost as fresh as the first time!
Reheating
To revive leftover cookies, a quick 10-second zap in the microwave softens the chocolate and brings back that freshly-baked warmth. Just don’t overdo it or the cookie can turn dry.
Frequently Asked Questions:
Final Thoughts
This Peanut Butter Kiss Cookies Recipe holds a special place in my heart—it’s simple, nostalgic, and utterly satisfying every time. Baking these feels like sharing a little warmth and joy, and I hope you find the same magic when you make them. They’re the kind of easy, classic cookie that’ll have everyone asking for the recipe—and you’ll love how effortless it is to whip up a batch anytime you need a sweet pick-me-up.
Print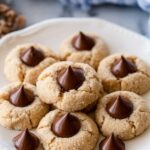
Peanut Butter Kiss Cookies Recipe
- Prep Time: 20 minutes
- Cook Time: 13 minutes
- Total Time: 33 minutes
- Yield: 40 cookies
- Category: Dessert
- Method: Baking
- Cuisine: American
Description
This Easy Peanut Butter Blossoms recipe features soft and chewy peanut butter cookies topped with Hershey's Kisses, blending classic flavors into a nostalgic treat perfect for any occasion.
Ingredients
Cookie Dough
- ½ cup unsalted butter, softened (113 g)
- ¾ cup creamy peanut butter (213 g)
- ¾ cup light brown sugar, packed (138 g)
- ¼ cup granulated sugar (50 g), plus more for rolling
- 1 teaspoon vanilla extract (5 ml)
- 1 large egg
- 1 tablespoon milk (15 ml)
- ½ teaspoon baking soda
- ¼ teaspoon salt
- 1 ¾ cup all-purpose flour (248 g)
Topping
- 40 Hershey's Kisses (or a few more)
Instructions
- Preheat oven: Preheat your oven to 350°F. Line two cookie sheets with silicone baking mats or parchment paper to prevent sticking.
- Mix wet ingredients: In a large bowl, combine the softened butter and creamy peanut butter using a hand or stand mixer until smooth. Add both the light brown sugar and granulated sugar; cream together until the mixture is smooth and well combined.
- Add egg and flavorings: Mix in the egg, vanilla extract, and milk on medium speed until fully incorporated.
- Combine dry ingredients: Stir in baking soda and salt, then gradually add the flour while mixing just until the dough is smooth and cohesive. Be sure to scrape down the sides of the bowl to ensure even mixing.
- Prepare dough balls: Pour about ½ cup of granulated sugar into a separate bowl. Scoop 1 tablespoon-sized portions of dough, roll each in the granulated sugar, and place them 2 inches apart on the prepared cookie sheets.
- Bake cookies: Bake the cookies for 13 minutes or until the edges are lightly golden and the tops are no longer glossy.
- Add Hershey's Kisses: Immediately after removing the cookies from the oven, press one Hershey's Kiss into the center of each warm cookie.
- Cool and serve: Allow the cookies to cool completely on the baking sheets before removing to avoid breaking and to let the chocolate set.
Notes
- Use silicone mats or parchment paper to prevent sticking and for easy cleanup.
- Make sure the butter is softened but not melted for proper creaming with sugars.
- Do not overmix the dough once the flour is added to keep the cookies tender and chewy.
- Roll the dough balls generously in sugar for a slight crunchy coating.
- You can substitute Hershey's Kisses with other chocolate candies if desired.
- Storing cookies in an airtight container keeps them fresh for up to 5 days.
Nutrition
- Serving Size: 1 cookie
- Calories: 152 kcal
- Sugar: 9 g
- Sodium: 122 mg
- Fat: 8 g
- Saturated Fat: 3 g
- Unsaturated Fat: 5 g
- Trans Fat: 0 g
- Carbohydrates: 17 g
- Fiber: 1 g
- Protein: 3 g
- Cholesterol: 17 mg


Leave a Reply