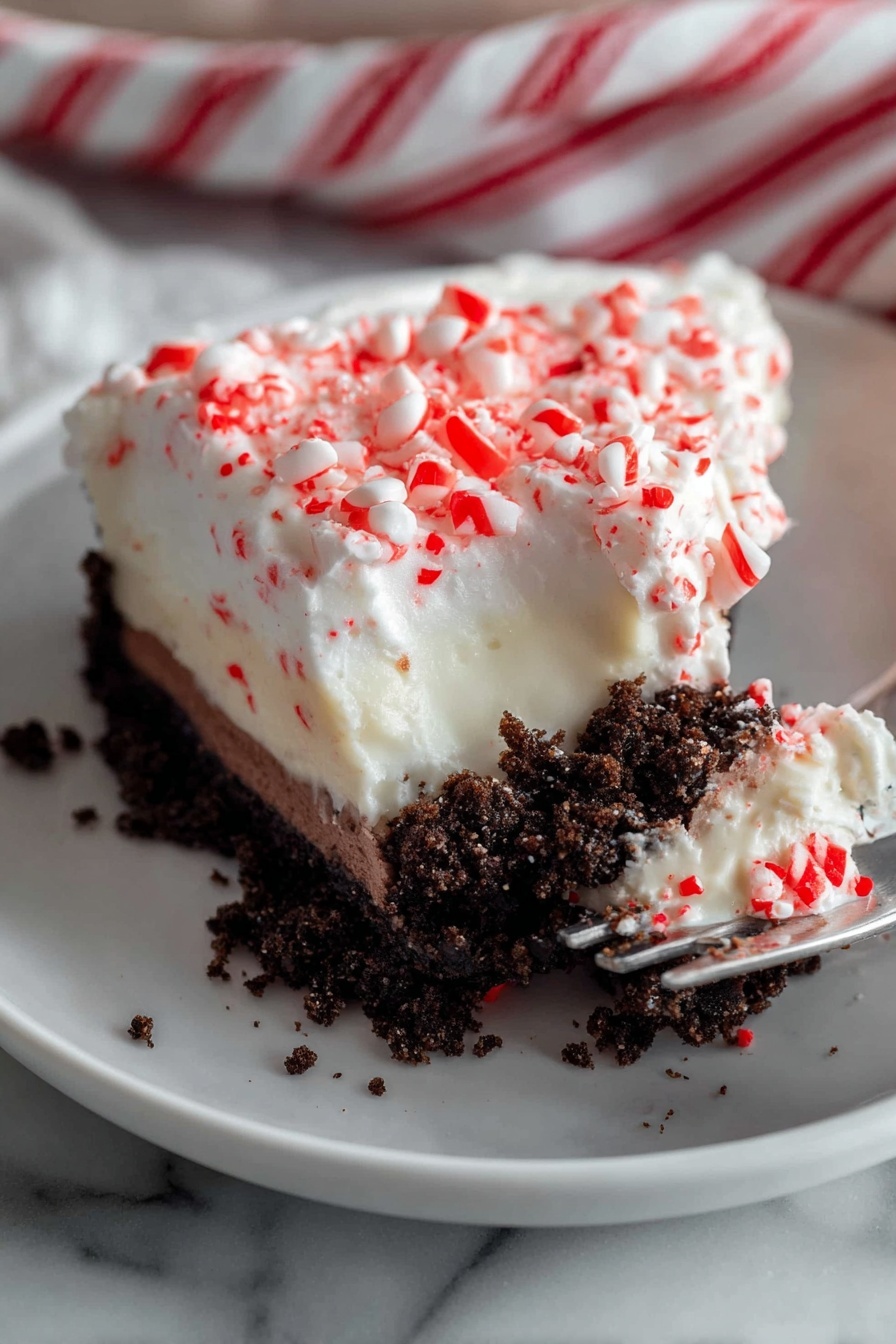
There’s something about peppermint and creamy layers that just screams holiday magic. This Candy Cane Lush No-Bake Dessert Recipe is that perfect seasonal treat that combines a cookie crust, fluffy cream cheese filling, and a dreamy white chocolate pudding—all topped with crushed candy canes for that festive crunch.

Jump to:
Why You'll Love This Recipe
I genuinely love how easy this Candy Cane Lush No-Bake Dessert Recipe is to put together, especially when you want something festive but fuss-free. It always feels like a celebration on a plate and is a guaranteed crowd-pleaser whether it’s a holiday party or a simple family gathering.
- No-Bake Convenience: Skip the oven and still get a rich, layered dessert that looks impressive but takes minutes to prep.
- Festive Flavors: The combination of creamy white chocolate pudding and peppermint candy canes is a holiday classic that feels fresh and indulgent.
- Texture Play: Crunchy Oreo crust, smooth cream cheese layer, fluffy whipped topping, and candy cane crunch give every bite something fun to enjoy.
- Make-Ahead Friendly: Prepare it the day before and it tastes even better once all those layers set.
Ingredients & Why They Work
Each ingredient plays a special role, bringing balance and texture to this Candy Cane Lush No-Bake Dessert Recipe. It’s like every layer is a little part of the holiday story coming together, and knowing your ingredients will help you nail the perfect result.
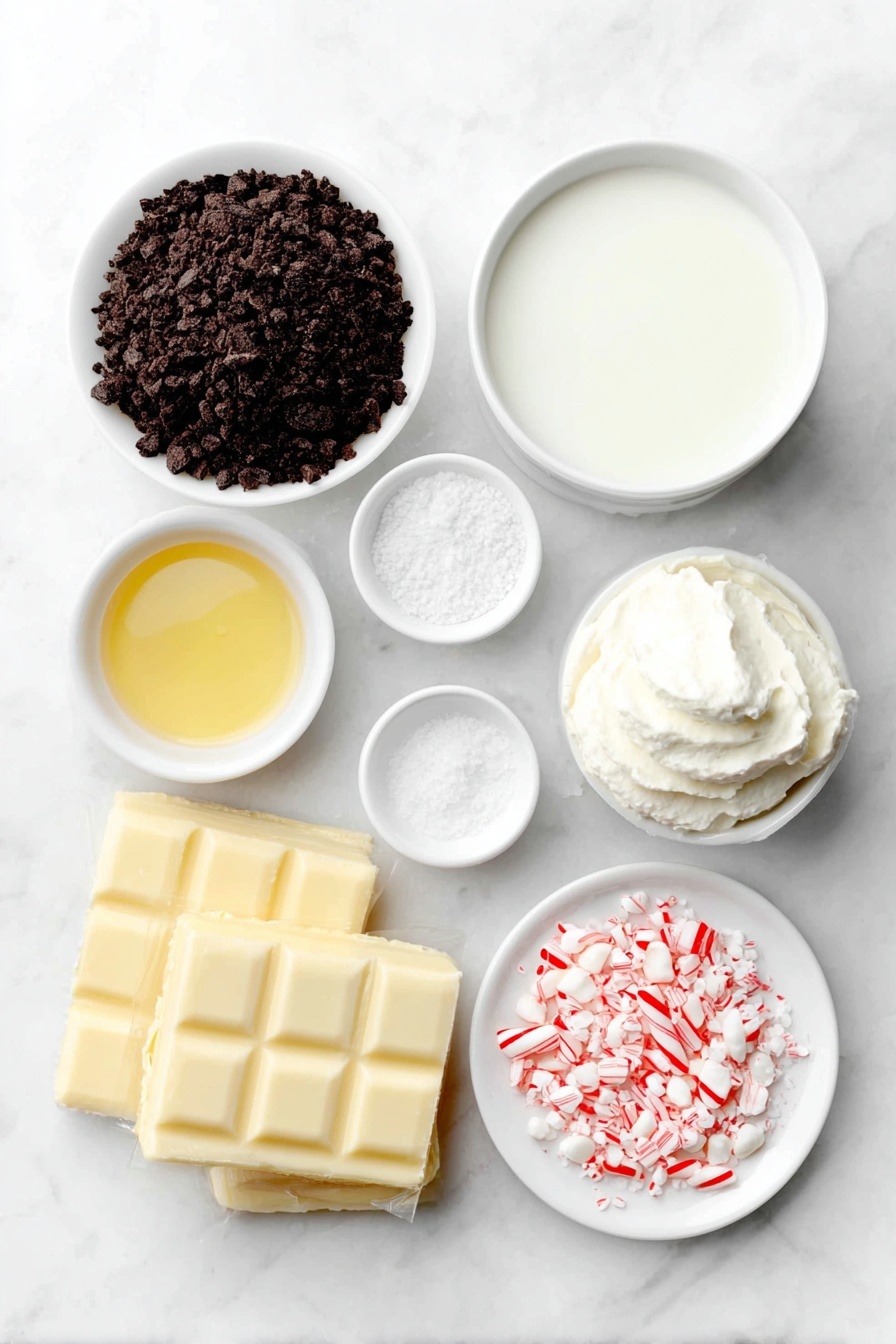
- Oreo cookies: These cookies create a sturdy yet crumbly base with just the right amount of chocolaty richness; using classic Oreos works best, avoid flavored varieties for balance.
- Unsalted butter: Melting this binds the cookie crumbs so the crust stays firm but still tender under all the layers.
- Salt: Just a pinch, but it brings out the sweetness and keeps everything from tasting flat.
- Cream cheese: Softened cream cheese adds that tangy richness and smooth texture, offering a nice contrast to the sweet layers.
- Powdered sugar: It sweetens the cream cheese filling without grittiness thanks to its fine texture.
- Milk: Helps thin the cream cheese mixture and is essential for setting the pudding layer light and silky.
- Whipped topping: Gives the dessert that fluffy, cloud-like quality making it feel indulgent but airy; Cool Whip is a convenient choice.
- Crushed candy canes: Break these just right—small enough to sprinkle throughout and on top but big enough to give a satisfying peppermint crunch.
- White chocolate pudding mix: This adds a creamy, dreamy layer that’s festive and pairs perfectly with the peppermint; instant pudding works great here.
- Cold milk: Needed to mix with pudding powder to create that smooth texture before setting.
Make It Your Way
What I love about this Candy Cane Lush No-Bake Dessert Recipe is it’s totally flexible to your holiday style. Play with the peppermint intensity or swap out Oreos for a different cookie if you like. Customize it to suit your crowd!
- Variation: I’ve tried adding a layer of mini chocolate chips on top of the cream cheese for some extra chocolatey goodness—it’s delightfully decadent!
- Dietary Swap: For a gluten-free version, try gluten-free chocolate sandwich cookies for the crust; it works surprisingly well.
- Seasonal Twist: Replace crushed candy canes with peppermint extract mixed into the cream cheese layer if you want less crunch but all the flavor.
Step-by-Step: How I Make Candy Cane Lush No-Bake Dessert Recipe
Step 1: Crafting the Oreo Crust
Start by pulsing those Oreos in a food processor until they’re fine crumbs – but not powder. Adding the salt and melted butter next is crucial; pulse just enough to combine so you get a uniform mixture that holds together when pressed. Press this firmly into the bottom of your 9x13 baking dish. Don’t skimp on pressing it evenly—that crust is going to support all the creamy layers, so a tight, even base is key. Pop it in the fridge while you prepare the filling.
Step 2: Whipping Up the Cream Cheese Layer
Beat softened cream cheese until silky smooth—this step really makes a difference in texture. Add powdered sugar and milk, beating for a couple of minutes until completely blended. Then gently fold in one cup of whipped topping and half of the crushed candy canes. Spreading this evenly over the chilled crust is where your dessert starts to look like a treat. The peppermint pieces sprinkled inside give just that touch of holiday sparkle.
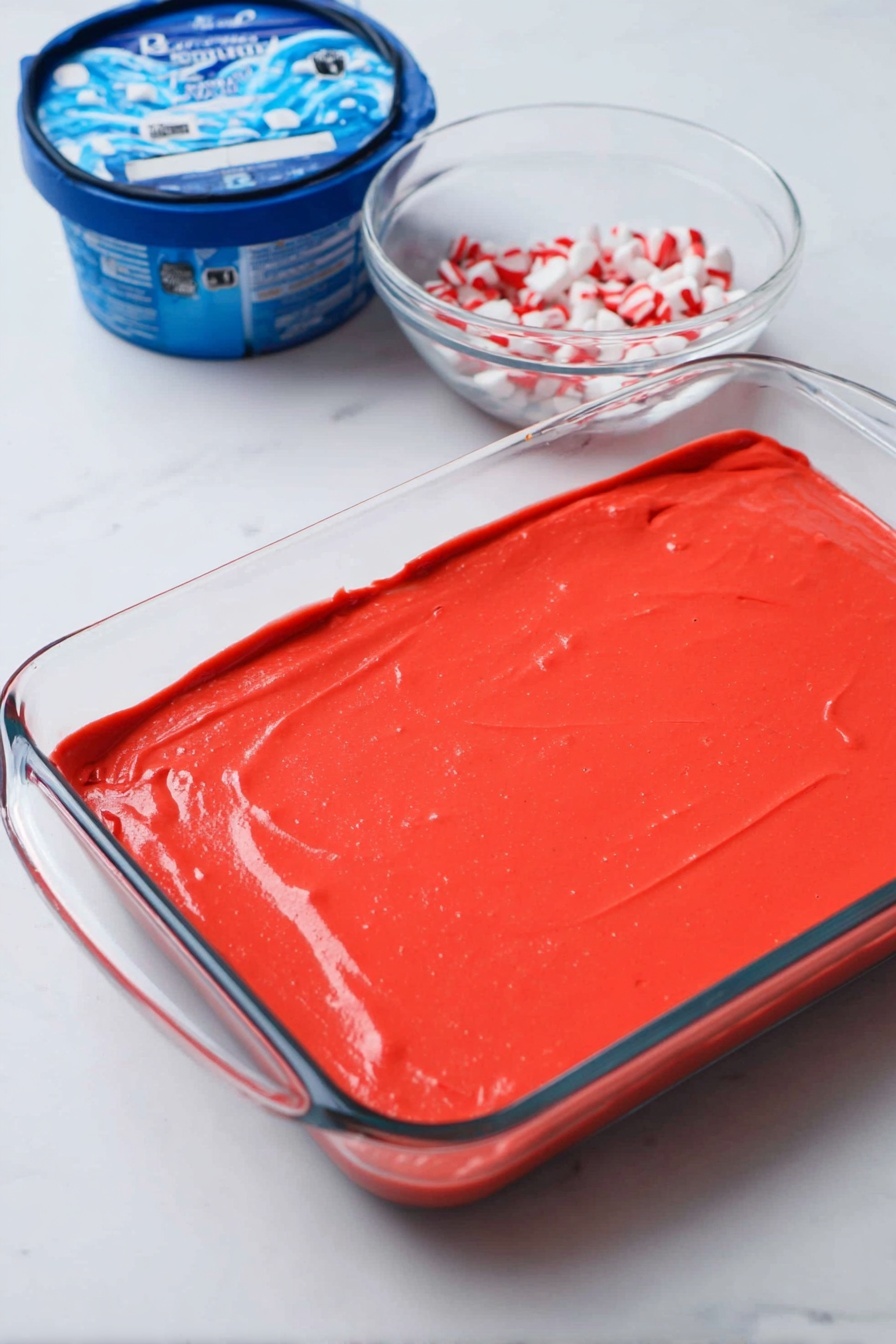
Step 3: Preparing the White Chocolate Pudding Layer
Now whisk together the pudding mix and cold milk for about two minutes until it thickens nicely. Don’t rush this part—you want it silky and fully mixed. Spread this over your cream cheese layer with a gentle hand so you don’t disturb what you’ve already built. This layer brings a luscious white chocolate flavor that pairs perfectly with the peppermint.
Step 4: Top It Off and Chill
Spread the remaining whipped topping over the pudding layer, smoothing it out nicely. Cover your dish with plastic wrap or foil and pop it in the fridge for at least four hours to let the layers set and flavors meld. When you’re ready to serve, sprinkle the rest of the crushed candy canes on top for that festive final touch.
Top Tip
Through my many iterations of this Candy Cane Lush No-Bake Dessert Recipe, I’ve found that the chilling time is essential to get those distinct layers set just right and the flavors to bloom. Here are my go-to tips for an effortlessly perfect dessert every time.
- Thoroughly Soften Your Cream Cheese: No lumps here! Make sure your cream cheese is room temperature before beating to get that ultra-smooth texture.
- Don’t Over-Pulse the Oreo Crumbs: Keep some texture in the crumbs so your crust isn’t too powdery and holds together better when pressed.
- Freshly Crush Candy Canes: I crush mine using the bottom of a rolling pin inside a zip-top bag—perfect-sized bits add festive crunch and look beautiful on top.
- Refrigerate Long Enough: Chilling for at least 4 hours (or overnight) really lets the pudding layer set and the flavors fuse deliciously.
How to Serve Candy Cane Lush No-Bake Dessert Recipe
Garnishes
I usually keep it simple and sprinkle extra crushed candy canes on top just before serving—it adds that peppermint pop and festive look everyone loves. Sometimes I add a few whole mini candy canes tucked into the edges for presentation. If I’m feeling fancy, a drizzle of white chocolate sauce complements it beautifully without overpowering.
Side Dishes
This dessert pairs wonderfully with classic holiday drinks—think hot cocoa or peppermint mocha. For a party, I love serving it alongside spiced mulled wine or a light fruit salad to balance the richness and add some freshness.
Creative Ways to Present
For gatherings, I sometimes layer this dessert in individual clear glasses, layering crust, cream cheese, pudding, and whipped topping in mini parfaits. It makes serving and portion control a breeze. Another fun idea is cutting it into festive shapes using cookie cutters once chilled, perfect for holiday buffets or gifting.
Make Ahead and Storage
Storing Leftovers
I always store leftovers covered tightly with plastic wrap or an airtight lid in the fridge. This keeps it fresh for up to 3 days, and honestly, it tastes even better the next day once all the flavors have mingled perfectly.
Freezing
I’ve frozen this dessert before, wrapped tightly in foil and plastic wrap. It freezes well for up to a month, though the texture of the whipped topping can change a bit. Thaw overnight in the fridge for best results, but I personally prefer it fresh or refrigerated.
Reheating
This dessert is best served chilled, so reheating isn’t really recommended. If you want softer whipped topping, leaving it out for 10-15 minutes before serving makes it easier to cut and enjoy. Otherwise, it’s a cool, refreshing treat straight from the fridge.
Frequently Asked Questions:
Absolutely! While Oreos add a nice chocolate flavor and sturdy texture, you can swap in chocolate graham crackers, gingersnaps, or any favorite chocolate sandwich cookie to suit your taste or dietary needs. Just make sure they crush well and mix with the butter to form a solid crust.
Chilling is important because it allows the pudding and cream cheese layers to set properly and the flavors to meld. If it’s not chilled long enough, the dessert might be runny or fall apart when cut. I recommend at least 4 hours, but overnight is best!
Definitely! This Candy Cane Lush No-Bake Dessert Recipe is perfect for making ahead. Prepare it a day or two in advance, store it covered in the fridge, and it actually tastes better as the flavors develop.
I like to put the candy canes in a sturdy zip-top plastic bag, seal it tightly, then gently crush with a rolling pin or the bottom of a heavy pan. This keeps the mess contained and lets you control the size of the pieces easily.
Final Thoughts
This Candy Cane Lush No-Bake Dessert Recipe holds a special place in my holiday traditions because it’s the perfect blend of simple prep and festive flavor. I love sharing it at Christmas gatherings where the creaminess, crunch, and peppermint sparkle never fail to bring smiles. Give it a try—you’ll find it’s the kind of dessert everyone sneaks back for seconds on.
Print
Candy Cane Lush No-Bake Dessert Recipe
- Prep Time: 15 minutes
- Cook Time: 0 minutes
- Total Time: 4 hours 15 minutes
- Yield: 12 servings
- Category: Dessert
- Method: No-Cook
- Cuisine: American
- Diet: Vegetarian
Description
Candy Cane Lush is a delightful no-bake dessert featuring layers of Oreo cookie crust, creamy peppermint cream cheese filling, white chocolate pudding, and whipped topping, garnished with festive crushed candy canes for a perfect holiday treat.
Ingredients
Crust
- 36 Oreo cookies (14 oz package)
- ¼ cup unsalted butter, melted
- ¼ teaspoon salt
Filling
- 1 (8 oz) package cream cheese, softened
- ½ cup powdered sugar
- 2 tablespoons milk
- 1 (12 oz) carton whipped topping, thawed, divided
- ¾ cup crushed candy canes, divided
- 2 (3.3 oz each) packages white chocolate pudding mix
- 2 ¾ cups cold milk
Instructions
- Prepare the crust: In a food processor, pulse the Oreo cookies into fine crumbs. Add salt and melted butter and pulse just until combined. Press the mixture firmly into the bottom of a 9x13-inch baking dish. Place in the refrigerator to chill while preparing the filling.
- Make the cream cheese layer: In a medium bowl, beat the softened cream cheese with an electric mixer until smooth. Add powdered sugar and milk, then continue beating until smooth and creamy, about 2 minutes.
- Combine cream cheese and whipped topping: Fold in 1 cup of the thawed whipped topping along with ½ cup of the crushed candy canes into the cream cheese mixture. Spread this evenly over the chilled cookie crust.
- Prepare the pudding layer: In a clean bowl, whisk together the white chocolate pudding mix and cold milk for 2 minutes or until thickened. Spread the pudding evenly over the cream cheese layer.
- Top with whipped topping: Spread the remaining whipped topping evenly over the pudding layer. Cover the dish with plastic wrap or foil and refrigerate for at least 4 hours to set.
- Garnish and serve: Before serving, sprinkle the top with the remaining crushed candy canes for a festive finish. Enjoy your Candy Cane Lush!
Notes
- This recipe is a no-bake dessert, making it quick and easy to prepare for holiday gatherings.
- You can substitute crushed peppermint candies if candy canes are unavailable.
- Make sure to use softened cream cheese for a smooth filling layer.
- Chilling the dessert for at least 4 hours ensures the layers set properly and flavors meld beautifully.
- For a lower fat option, consider using low-fat cream cheese and whipped topping alternatives.
Nutrition
- Serving Size: 1 serving
- Calories: 350 kcal
- Sugar: 28 g
- Sodium: 210 mg
- Fat: 20 g
- Saturated Fat: 12 g
- Unsaturated Fat: 7 g
- Trans Fat: 0 g
- Carbohydrates: 35 g
- Fiber: 1 g
- Protein: 4 g
- Cholesterol: 35 mg


Leave a Reply