Imagine biting into a rich, fudgy chocolate brownie topped with layers of coconut, sweetened condensed milk, and colorful M&Ms — that’s exactly what makes this Christmas Layer Brownie Bars Recipe a showstopper for the holidays. It’s festive, fun, and surprisingly easy to make, perfect for sharing with friends or family over a cozy cup of cocoa.

Jump to:
Why You'll Love This Recipe
This Christmas Layer Brownie Bars Recipe isn’t just another dessert — it’s a delightful layering of textures and flavors that feels like a mini celebration in every bite. I’ve made these bars for holiday parties, and the way the colors pop alongside the richness never fails to impress guests.
- Layered Goodness: The way the coconut, condensed milk, M&Ms, and sprinkles create distinct layers adds complexity beyond a simple brownie.
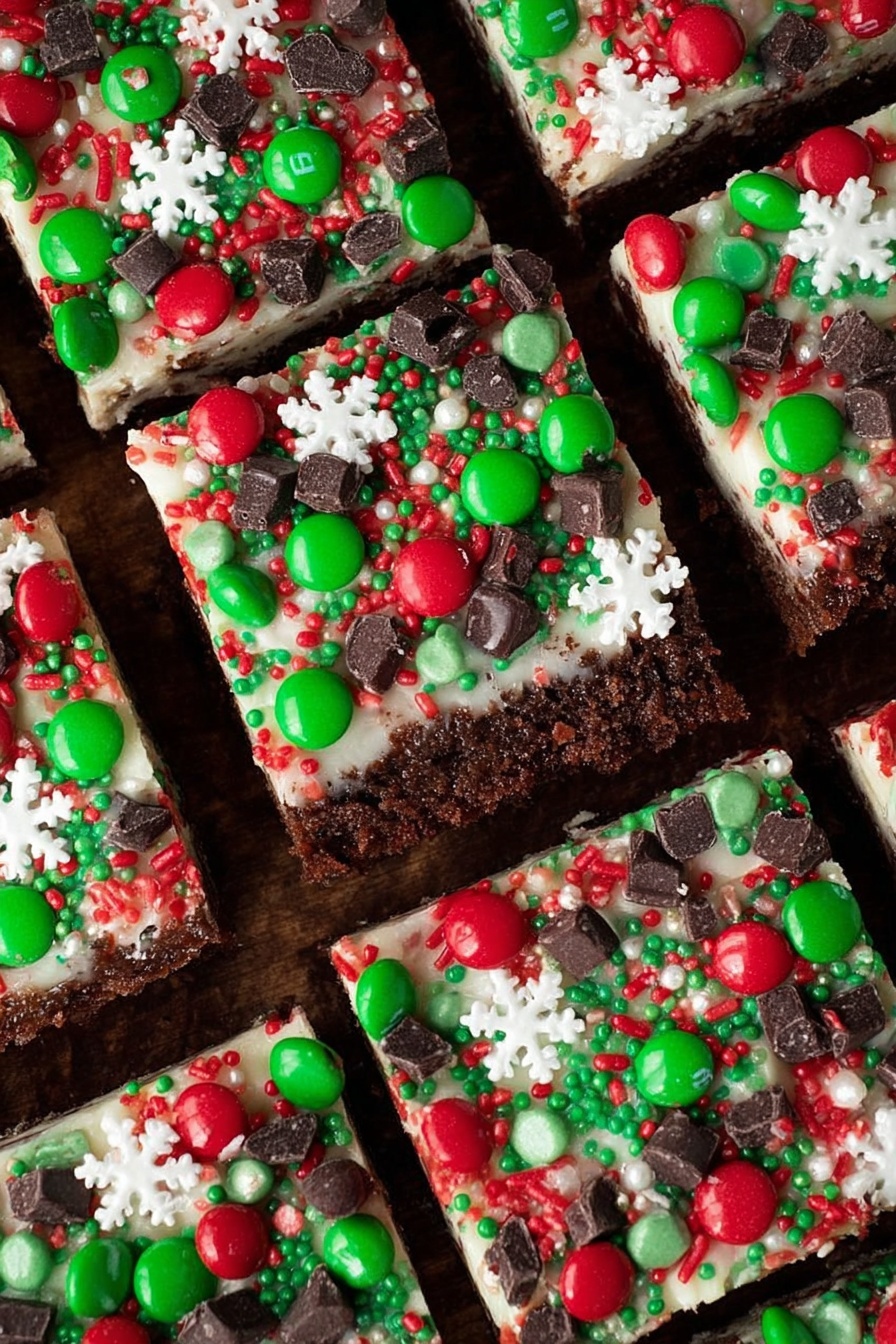
- Festive and Fun: The colorful holiday M&Ms and sprinkles make these bars visually irresistible for any Christmas gathering.
- Easy to Customize: You can tweak the nuts, chocolate chips, or candies for your favorite holiday flavor combo.
- Perfect Make-Ahead Treat: These bars keep well and taste even better the next day, which is a lifesaver during busy holidays.
Ingredients & Why They Work
Every ingredient in this Christmas Layer Brownie Bars Recipe plays a crucial role in delivering that perfect balance of fudgy, creamy, crunchy, and sweet. I always suggest picking the best quality chocolate and fresh nuts for the richest flavor.

- Semi-sweet chocolate chips: Melts smoothly with butter for that rich brownie base.
- Salted butter: Adds creaminess and balances sweetness; make sure it’s room temperature for even melting.
- Granulated sugar: Sweetens the batter and contributes to that classic chewy brownie texture.
- Eggs (whole and yolk): Provide structure and moisture while keeping brownies tender.
- All-purpose flour: Gives just the right amount of body — not cakey, not too dense.
- Vanilla extract: Enhances the chocolate flavors and adds warm depth.
- Nuts (optional): I love toasted pecans or walnuts for crunch and earthiness.
- Holiday M&Ms (mini and regular): Add cheerful color and melty chocolate pockets.
- Sweetened flaked coconut: Brings chewy, tropical texture contrast to the chocolate.
- Sweetened condensed milk: Creates a luscious caramel-like layer that ties everything together.
- Holiday sprinkles: For that festive sparkle and extra crunch on top.
Make It Your Way
I love playing around with this recipe depending on the mood I’m in or what’s in my pantry. Feel free to swap out ingredients or scale up the nuts and candies for a truly decadent treat that’s all your own.
- Nut-Free Version: I once made these for a school event, so I just skipped the nuts and added extra M&Ms — they were snapped up instantly!
- White Chocolate Swap: Try white chocolate chips instead of semi-sweet for a sweeter, creamier bar that complements the coconut beautifully.
- Extra Coconut Lover: Double the coconut for chewy bursts in every bite — it makes the bars even more tropical and festive.
- Spiced Up: Add a pinch of cinnamon or nutmeg to the batter for a subtle holiday warmth that I found unexpectedly delightful.
Step-by-Step: How I Make Christmas Layer Brownie Bars Recipe
Step 1: Prepare and Melt Chocolate
First, I preheat the oven to 350°F and line my 9-inch baking pan with foil, spraying it lightly so the bars don’t stick. Then, I melt the butter together with 1½ cups of semi-sweet chocolate chips in the microwave. I do this in 30-second intervals, stirring well each time to avoid burning — you want it smooth and glossy, like a chocolate mirror.
Step 2: Mix the Brownie Batter
Once melted, I beat in the sugar first – this step helps achieve that wonderful fudgy texture – then the vanilla and eggs. When everything looks well combined, I gently fold in the flour until just mixed; over-mixing can make the brownies tough, so I always stop as soon as the flour disappears.
Step 3: Bake the Base Layer
Pour the batter into the prepared pan and bake for 20 minutes. The brownies will still jiggle slightly when you gently shake the pan — that’s exactly how they should look at this stage.
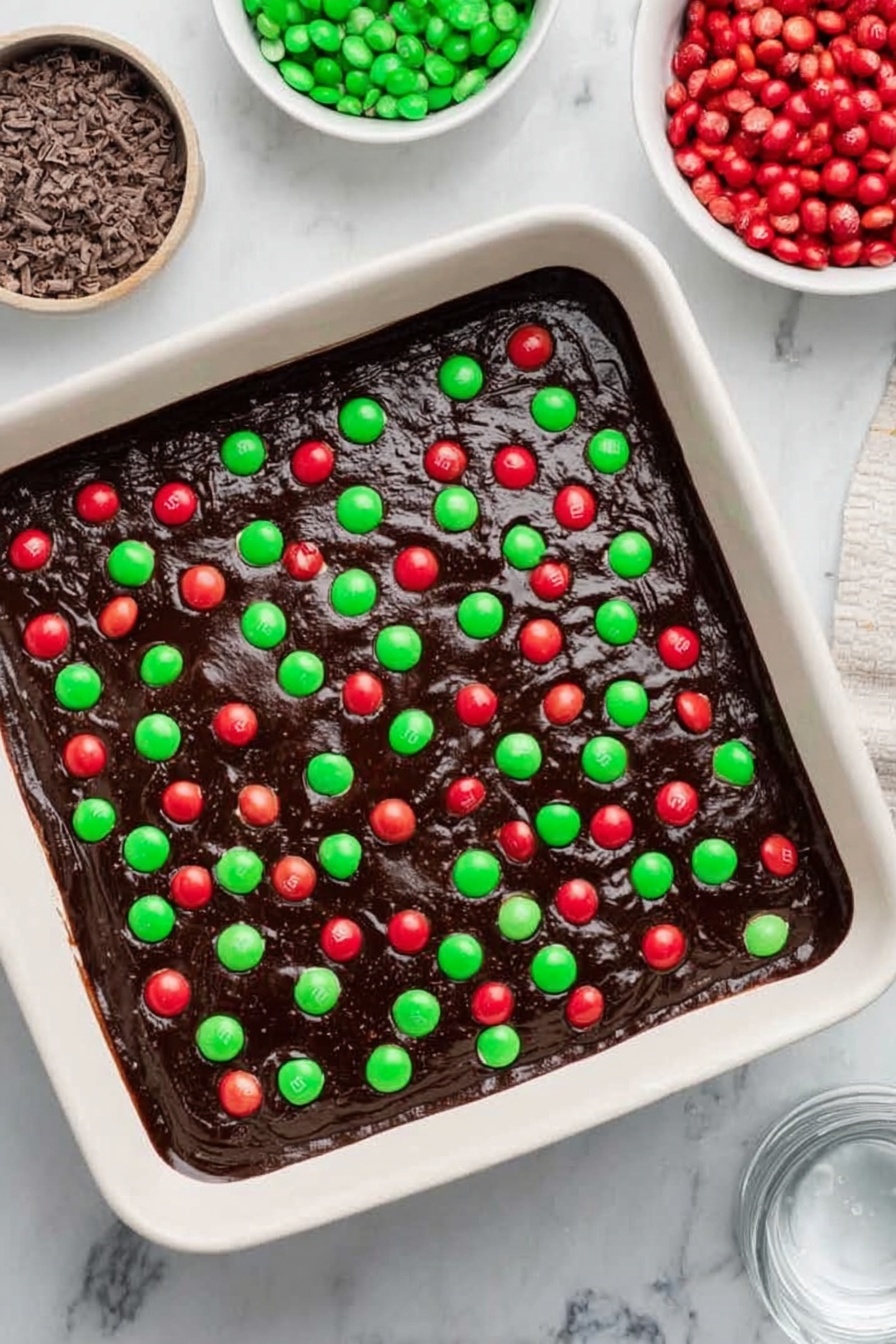
Step 4: Add the Magic Layers
Now the fun part! I sprinkle on the nuts, half of the remaining semi-sweet chocolate chips, and half of the M&Ms, then add the shredded coconut all over the top. Drizzling the sweetened condensed milk evenly is key here — I spread it gently with the back of a spoon to cover the layers without disturbing them.
Step 5: Final Sprinkle and Bake
I finish layering with the rest of the chocolate chips, M&Ms, and holiday sprinkles, then pop the pan back into the oven for about 25 minutes. I keep an eye out to make sure the edges get golden but the center stays moist. If the top browns too quickly, a loose foil tent saves the day.
Step 6: Cool and Cut
Patience is a virtue here — these bars need to cool completely before slicing. I usually cool them in the pan on a wire rack for about an hour, then remove the foil to get perfect squares with a sharp knife. This step ensures clean cuts without crumbling or sticking.
Top Tip
From countless holiday bake sessions, I’ve learned that a good foil or parchment lining combined with thorough but gentle mixing and proper timing will give you those perfect, layered Christmas brownie bars every time.
- Melting Chocolate Gradually: Avoids burnt spots and keeps the chocolate silky, which sets the base for a smooth batter.
- Don’t Overmix: It’s tempting to stir every last bit of flour in, but stop as soon as it’s combined to keep the brownies tender.
- Even Layering: Drizzle the condensed milk slowly and spread gently to evenly moisten the toppings without mixing layers.
- Cool Completely: Cutting while warm causes a mess; trust the cooling time, and your bars will slice beautifully.
How to Serve Christmas Layer Brownie Bars Recipe
Garnishes
I usually keep the garnishes simple — those holiday sprinkles on top add enough sparkle and crunch. Sometimes, I dust a little powdered sugar over the bars for a snowy effect that kids adore, or serve with a dollop of whipped cream to cut through the sweetness.
Side Dishes
I like pairing these bars with a warm mug of spiced hot chocolate or a cup of rich coffee. For larger gatherings, I offer a simple cheese platter or fresh fruit to balance the indulgence.
Creative Ways to Present
For holiday parties, I arrange the bars on a festive platter lined with evergreen sprigs and cranberries for visual wow. Another fun idea is to cut them into bite-sized pieces and serve with toothpicks for easy grab-and-go treats.
Make Ahead and Storage
Storing Leftovers
I store leftovers in an airtight container at room temperature, and they stay delicious for up to a week. The flavors actually meld and deepen overnight, making day-old bars a true highlight!
Freezing
These bars freeze beautifully. I slice them before freezing, then layer them between parchment paper in a freezer-safe container. When you want a treat, simply thaw at room temperature or pop a few pieces in the microwave for 15 seconds for that out-of-oven feeling.
Reheating
Reheating is gentle — I recommend warming them briefly in the microwave or a low oven (about 300°F for 5–7 minutes) to keep the edges chewy without drying out the bars.
Frequently Asked Questions:
Absolutely! The nuts add crunch, but skipping them won’t affect the overall texture too much, especially if you add a few extra M&Ms or sprinkles for fun.
Stored in a sealed container at room temperature, these bars will stay fresh and delicious for up to one week. The flavors even improve after a day or two!
Yes! Substitute the all-purpose flour with a gluten-free flour blend that measures cup-for-cup. Just be mindful of the texture, and you might want to add a little extra binding agent if your blend doesn’t already have it.
Cool the bars completely before cutting—ideally, chill them in the fridge for 30 minutes to firm up. Use a sharp knife wiped clean between cuts for neat slices.
Final Thoughts
This Christmas Layer Brownie Bars Recipe has become one of my go-to festive treats because it brings together everything I love about holiday baking: indulgence, color, and a little splash of magic. I truly think you’ll find this recipe both fun to make and impossible to resist. So grab your apron and get ready to create a dessert that’ll have everyone asking for seconds!
Print
Christmas Layer Brownie Bars Recipe
- Prep Time: 15 minutes
- Cook Time: 45 minutes
- Total Time: 60 minutes
- Yield: 9 bars
- Category: Dessert
- Method: Baking
- Cuisine: American
Description
Christmas Magic Layer Brownie Bars feature a rich chocolate brownie base topped with layers of nuts, chocolate chips, holiday M&Ms, sweetened coconut, and sweetened condensed milk, finished with festive sprinkles. These delightful bars are perfect for holiday celebrations, combining chewy, crunchy, and sweet textures in every bite.
Ingredients
Brownie Base
- 1½ cups semi-sweet chocolate chips
- ½ cup salted butter (1 stick)
- 1 cup granulated sugar
- 2 large eggs
- 1 large egg yolk
- 1 cup all-purpose flour
- ½ teaspoon vanilla
Toppings
- ¾ cup nuts (optional, divided)
- ¼ cup mini holiday M&Ms (divided)
- ¾ cup regular holiday M&Ms (divided)
- ½ cup semi-sweet chocolate chips (divided)
- 1 cup sweetened flaked coconut
- ¾ cup sweetened condensed milk (from a 14 ounce can)
- ¼ cup holiday sprinkles
Instructions
- Preheat and Prepare Pan: Preheat your oven to 350 degrees F. Line a 9-inch baking pan with foil or parchment paper and spray with nonstick cooking spray to prevent sticking.
- Melt Butter and Chocolate: Place the butter and 1½ cups of semi-sweet chocolate chips in a large microwave-safe bowl. Microwave on high for 30 seconds, then stir. Continue microwaving in 30-second increments, stirring each time, until the mixture is melted and smooth.
- Mix Batter: Beat the granulated sugar into the melted chocolate mixture. Then add the vanilla extract, whole eggs, and egg yolk, mixing well until fully combined.
- Add Flour: Gently stir in the all-purpose flour until just combined, being careful not to overmix. Pour the batter into the prepared baking pan and spread evenly.
- Bake Brownie Base: Bake in the preheated oven for 20 minutes. The brownies will still jiggle slightly but should be set on top when done.
- Layer Toppings: Remove the pan from the oven. Evenly sprinkle the nuts, half of the divided semi-sweet chocolate chips, half of the M&Ms (both mini and regular), and then all of the shredded coconut over the brownie base.
- Add Condensed Milk: Pour the sweetened condensed milk evenly over the toppings, then gently spread it to ensure it is distributed uniformly.
- Final Toppings: Sprinkle the remaining semi-sweet chocolate chips, remaining M&Ms, and lastly the holiday sprinkles on top.
- Second Bake: Return the pan to the oven and bake for an additional 25 minutes, or until the edges turn golden brown and the center is set and just beginning to brown. If the top browns too quickly, loosely tent with foil to prevent burning.
- Cool and Serve: Allow the bars to cool completely in the pan before lifting them out using the foil or parchment paper. Cut into 9 equal squares using a sharp knife. Store in an airtight container for up to one week.
Notes
- For a nut-free version, omit the nuts or substitute with seeds like pumpkin or sunflower seeds.
- Use high-quality semi-sweet chocolate chips for best flavor and texture.
- Make sure not to overbake the brownies on the first bake; a slight jiggle means they will continue cooking during the second bake.
- To prevent sprinkles and M&Ms from melting too much, add them lightly after the condensed milk layer and bake gently.
- Wrap the bars tightly when storing to keep them fresh and chewy.
Nutrition
- Serving Size: 1 bar
- Calories: 499 kcal
- Sugar: 46 g
- Sodium: 117 mg
- Fat: 26 g
- Saturated Fat: 15 g
- Unsaturated Fat: 10 g
- Trans Fat: 0 g
- Carbohydrates: 60 g
- Fiber: 4 g
- Protein: 7 g
- Cholesterol: 49 mg


Leave a Reply